Monday, July 22, 2013

BOSTON!!!

So I've kind of dropped the ball on getting my regularly-scheduled posts out for the past week, but I feel like I have a relatively decent excuse: I was on vacation!

I have a couple of friends living in Boston right now, so I took advantage of my job's generous paid time off policy to take a long weekend seeing a corner of the East Coast I'd never seen before. You might recall from my goal list that I hope to visit all 50 states in my life, and on this trip I knocked a whopping THREE off the list!

I spent most my time in Boston, but went to Rhode Island for Corgi-palooza (a friend of a friend was performing and I wasn't about to pass up on that opportunity!) and Connecticut to visit a friend who is an RA at a summer camp there.

Here are some pictures of my adventures. Unfortunately, I am terrible about taking pictures, so I managed to leave without getting any pictures of me with my friends, but I did get some good shots of some historical places in Boston!


The East Cost has the most healthy hydrangeas I've ever seen. Look at the colors! 

Park St church 

The Old Corner Bookstore (one of the oldest publishing houses in the country) is now a CHIPOTLE.  Sad.

This is the guy who rode with Paul Revere. Frankly, I think he's bitter Longfellow's poem wasn't about him.

Ok, I lied. I got ONE picture with one of my friends. CHEESE!

This sums up Boston for me - history in the heart of a gorgeous city. 
Hot and humid though my trip might have been, I had a ton of fun and can't wait to go back!


Saturday, July 13, 2013

Analytics Shirts!

During my first departmental meeting at my job, my boss brought up the fact that he had asked the design team to help bring his dream of an Analytics logo to life. The concept featured a capital letter A with super-ripped arms clutching fistfuls of cash, eagle wings keeping the A hovering over lightening-filled clouds, and a Latin motto overhead.

Shortly thereafter, we had a mock-up from a member of the design team, hopefully made outside of work hours. My company might just be the most delightfully ridiculous place ever. I love it.

At my company, every department gets a quarterly allowance to do team building activities. A while back, my boss approached us and said that for our next team building, he wanted to use our logo and make bleach-dyed shirts and that he wanted me to organize it.

Cue me getting very excited and throwing together a quick email with the different techniques for bleach-dying, complete with photo examples.

Here's how we made our Analytics logo shirts!

First, we gathered our supplies.


  • Shirt
  • Watered-down bleach in a spray bottle - 1 part bleach to 2 parts water
  • Contact paper
  • Cardboard
  • Tape
  • Box cutter/exacto knife
  • Any other supplies you think you might need (tape measure, scissors, tailor's chalk, etc)


To make your stencil, sandwich a piece of contact paper between your pattern and a piece of cardboard. Tape the stencil to the contact paper and cut along the outside of your pattern. You have a choice of using the inside or the outside of the pattern. 


Then, you place your pattern on your shirt. Like I said, you have the option of using the inside (like this one) or the outside. With the inside, the design will stay the base color of the shirt and there will be a kind of sunburst around it of bleached shirt.


Here's an example of using the outside of the pattern. This way, the bleached part is the design.

You can see that the bleach has bled a little under the pattern. Spray sparingly with the bleach, because once it goes wild, it kind of ruins the outline.


Unfortunately, I don't have a picture of all of us wearing our awesome shirts... Maybe I should make taking more pictures one of my goals next month...

But I can say that you can see my boss wearing his shirt in this post of his blog! He and his wife are travelling the world right now. Lucky ducks. Oh, and I should probably mention that his shirt is the one that turned out the best. He really took his time cutting out the pattern and then waited to see how everybody else's shirts turned out before actually bleaching. I, on the other hand, rushed right into bleaching things and ended up saturating the shirt...

So what should I bleach next???

Monday, July 8, 2013

My Library Card

When I was a kid (which is weird for me to say because I'm still in denial about not being a kid), I loved the summer. I mean, what kid didn't? I loved the feeling of riding in our family van, sliding my flip-flops off and feeling the air conditioning on my toes. I loved going to the pool for swim lessons. I loved riding my bike all over my backyard. I loved jumping through the sprinkler.

But I especially loved the reading.

It was a rite of passage in my family to get our very own library card when we turned 5. I still have that card, with a sticker from every single summer reading program and the signature worn thin for the third time in the card's life. I used the number as my password for all of my accounts for years. I took it with me to Philadelphia for college, despite being around 2800 miles away from the nearest branch. That card is one of my most valued possessions.

My summer passport to the world


And I suppose it's because of the memories. Memories, not just of the wall of air conditioning that signaled entering the library, not just of searching for books and placing holds (our library was one of a pretty decent-sized chain, so I could almost always count on one of the branches having the books I wanted), not just getting to know the librarians through checking out books when I was young and volunteering at the library as I got older, not just growing out of the kids section into the young adult and finally into the fiction section: no, not just all that. I think the majority of my memories that are tied with my library card are not of the library itself. My memories are of the places that I took the books and the places the books took me.

It's the smell of chlorine, waiting for my brother to finish jumping off the high board after swim lessons. It's the feeling of air conditioning on my de-flip-flopped toes. It's driving to California for family vacations (to this day, I calculate travel time in potential read pages). It's being curled up in the cool, dark living room, hiding from the blazing heat of an August afternoon with my nose in a book.
9-year-old Kath in her natural habitat

But it's also the memories of crawling through the wardrobe with Lucy, moving the pencil with Matilda, flying to a mountain with Gwinna, stepping through the looking glass with Alice, finding the Sorcerer's Stone in my pocket with Harry, wishing for puffed sleeves with Anne, defeating the rats with Mattimeo, all of the adventures I went on with all the characters between the covers of a paperback.

I don't just read books: I get immersed in them. That's why when I read, I literally block out the world - family and friends have to holler to pull me back out (literally). I could go on and on about how I feel about books.

A few weeks ago, my parents and my brother and I drove to California for my grandpa's 90th birthday. I always have so much fun hanging out with my extended family, but I might have had an equally enjoyable time with my 30 hours of minimally interrupted reading time.

Outside: this. Inside: my nose in a book.

Admittedly, my reading habits have changed over the years. Instead of wandering out of a library with 7 books that I'll read over the next 9 days (at most), I tend to read longer books, more often than not on my Kindle (though I do read a physical book here and there)

But I have to say, though my library card number has changed and my mode of reading is mostly electronic, I  will never be able to shake the nostalgia and joy that I get out of sitting on the couch on a warm summer afternoon and cracking open a brand-new-to-me library book.

Saturday, July 6, 2013

Crocheted Tie

Do you ever have projects that you had SO much energy to work on for the first 2/3 and then.... just fizzled? I have about five of those waiting to be finished up. I guess you could call them Bruin Projects.

But I'm proud to say that that number used to be six, but I've recently finished this crocheted tie!

Last June (see what I mean about fizzling?!), I had a friend request a crocheted tie. Now bear in mind that I have a personal aversion to ever telling anybody "No," especially when it means I get to go yarn/fabric/craft supply shopping! I promptly bought the yarn (in brown, 5), I found a pattern (my first adventure with reading crochet charts), and off I went.

The pattern calls for you to crochet it double-width and then sew it up the back. After crocheting the agonizingly small 200+ rows, I stitched up the back and found, to my horror, that crochet stitches are very stretchy and therefore it was nearly impossible to get a good knot in the tie.

Well, I suppose that's why we craft, right? To find creative ways to solve problems.


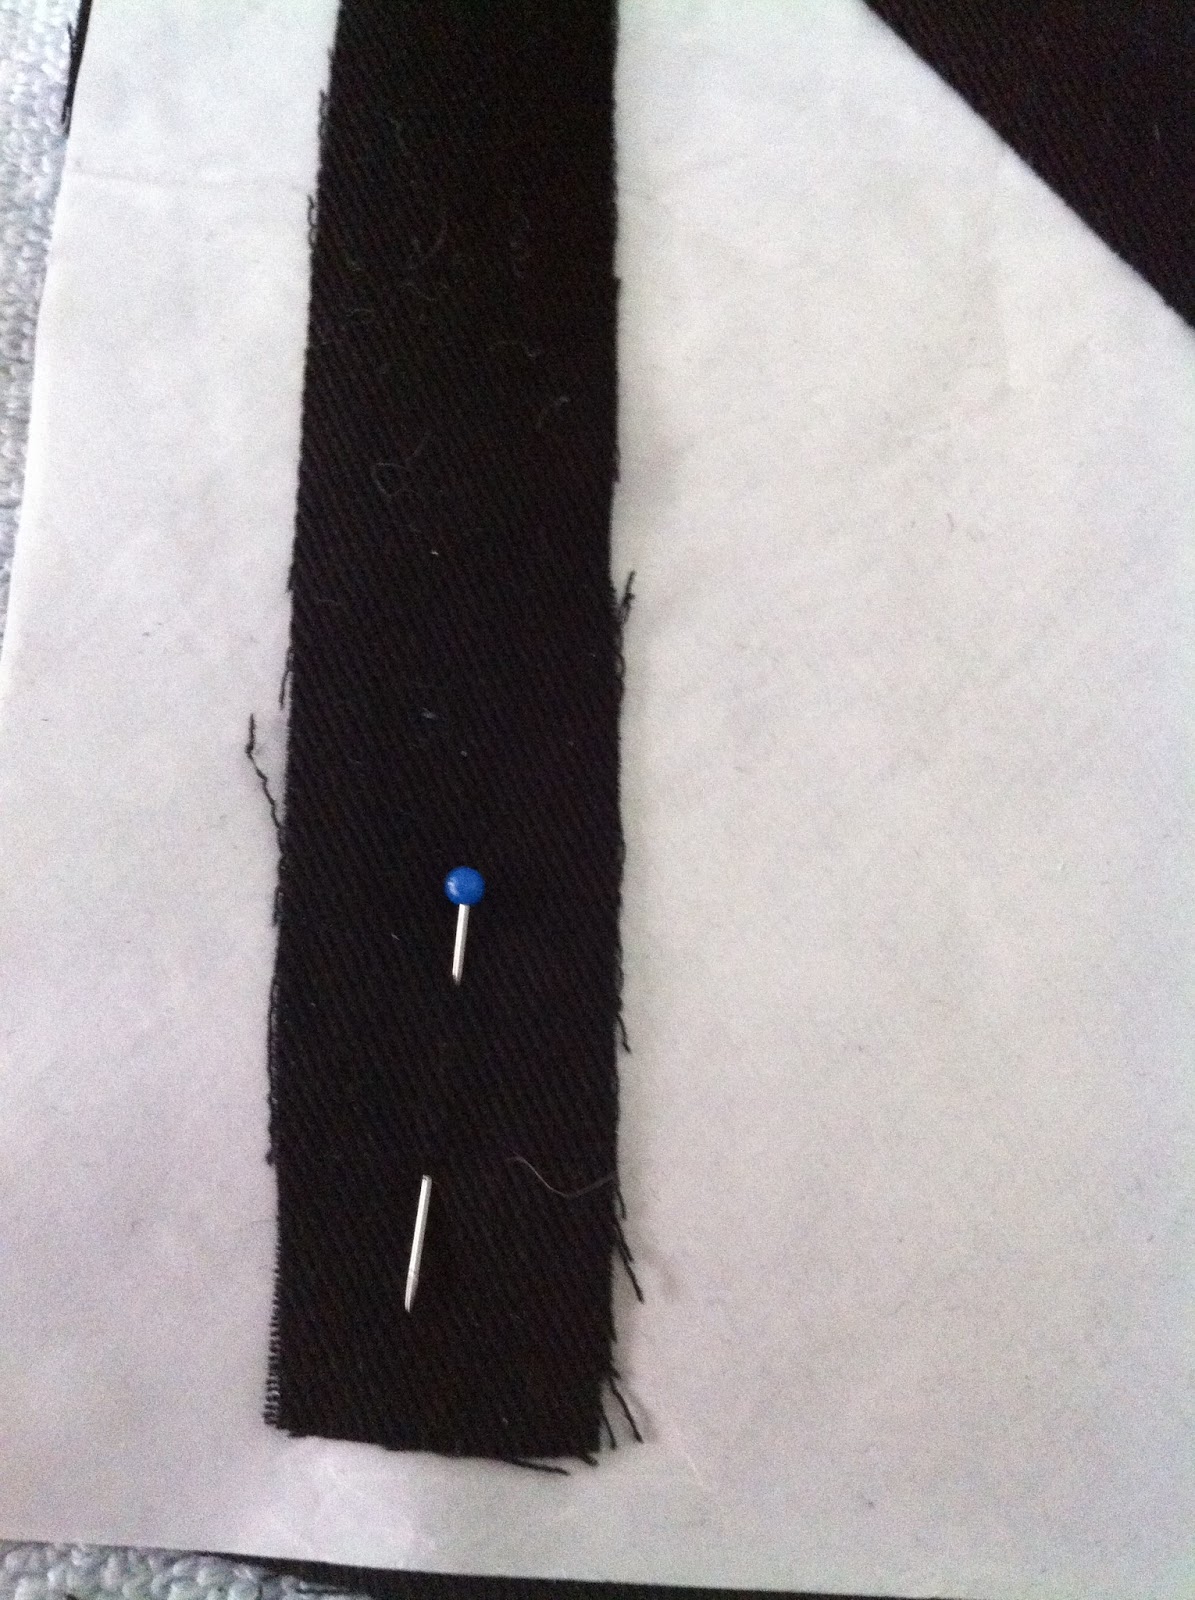
After some discussion with my mother (she fixes all my craft-related problems), I decided I just needed to iron in some interfacing. A few measurements, some frustrating sewing, and a few minutes with the iron, aaaaand....there was something stuck to the front of the tie.

Apparently there was something sticky on the ironing board cover, which transferred to my beautiful, darling stitches. Cue me freaking out, yelling a little bit, then stomping downstairs to dramatically present the damage to my mother. It was back to the drawing board in late September.

I'm not ashamed to say my mom fixed this one, too. Seriously, the woman could probably get 2000 year old stains out of Cleopatra's clothes. She's that magical with fabric.

By this point I was just sick of thinking about the stupid tie. I couldn't muster the enthusiasm for a third wave. So it sat in my to do queue until I finally stitched it up in April. But was it done? Oh-ho, no way - now it was too short.

See, the recipient has a self-professed absurdly long torso. So I had my brother try it on so I could maybe get an idea of where to put the loop in back and it was clear that it needed a couple more inches. So finally, in May, after 11 months of hanging over my head, the tie was complete.

If I did this project over again, I would definitely have measured the tie before I tied off the yarn. Also, when lining it, I would have layered the interfacing, fusing them together instead of trying to stitch pieces end to end. And I'd probably give it stripes or some sort of pattern.

Regardless, it is sent! And when the recipient receives it and takes pictures of himself in it (which I mandated via a card that simply read "PICS OR IT DIDN'T HAPPEN), I'll post them here.

What was the last lingering project that you've finished? (Or are there any you'd like to confess to?) Let me know in the comments!

Monday, July 1, 2013

First Monday Post!

In an earlier post, I mentioned that I was going to start blogging twice per week. This was to give me more structure and to encourage myself to spend more time working on my blog (for example, I really hate the color scheme, so the more I look at it, the more I want to change it!).

My Monday posts are going to be more of my self-help stuff. I'm a 20-something college grad who has very little idea what is going on in her life; I'm happy to report that I have a job that I adore, but that's about all that I have figured out. So this is going to be a way to prove to myself that I am slowly but surely "figuring it out."

It's lucky that this first Monday post has landed on the 1st of the month, because I've decided to start setting monthly goals! (Edit: Turns out, even if you have a post scheduled to publish, it won't publish if it's set as "draft." Eh, you live and learn, right?) There is a lot of research on how important goals are to a person's well-being, so in the wake of my post-graduation collapse (of body and mind, I must say), I realized that unless I set goals for myself, I'm going to just stagnate.

So I have a list of discrete goals for myself that I'm trying to work toward, but those are more long-term. I need short-term goals to keep me going. To that end, I'll be setting three goals to focus on over the course of the month. Analyst that I am, I'll have metrics by which to measure my success so that at the end of the month, I can say whether I succeeded or failed in a given month. Oh, and there's also going to be extra credit for each goal. Because I like bonus rounds.

So happy July! Here are my goals:


  • Get in the groove of posting on your blog
    • There's a reason that you started this blog. Don't give up on it!
    • What does success look like? The August goal post being the 10th post since this one.
    • What does failure look like? Fewer than 8 posts over the course of July. Shame.
    • BONUS: Travel posts from California and Boston!
  • Get back on board with Couch-to-5k
    • I started this program in May and loved it, but then I skipped a couple work outs, and that was the end of that.
    • What does success look like? Completing Week 5 of the program by the August goal post.
    • What does failure look like? Failing to make running a habit over the course of the month - not getting through 5 weeks of the program
    • BONUS: Do research on/register for an organize 5k.
  • Budget budget budget!
    • I am kind of a failure at personal finances right now. I mean, I'm not totally broke, but I find myself running thin or relying on my credit card near the end of a pay period. I can do better.
    • What does success look like? A written list of every expenditure over the course of the month  (extreme, yes, but I'm sick of feeling poor when I make a comfortable amount of money). From this, I should be able to draft a reasonable budget, complete with timeline within a month. 
    • What does failure look like? A credit card bill with the same balance as last month.
    • BONUS: Allocating small amounts to save toward larger purchases (dresser, drill, bedroom rug)
So that's what I hope to do with the next 30 (Edit: 29) days. I'll let you all know how it goes. Wish me luck!

Saturday, June 29, 2013

Scrabble Tile Pillows


I'm super-excited to bring you my first tutorial: Scrabble Tile Pillows!

My best friend is madly in love with Scrabble and other word games. I personally don't understand it because I am terrible at anagram-style puzzles. It probably has to do with my left/right brain balance, but whatever the reason, I haven't the patience for the game.  But my best friend - boy oh boy, does she ever like it. In fact, she loves that game so much that her now-husband proposed to her via Scrabble board. It was adorable.

For her birthday (and by "for her birthday", I mean "several months after the fact, when I finally got around to making them"), I decided I would make her some pillows in the style of Scrabble tiles. Here's the finished product (and can I just say that I AM SO PROUD OF HOW THEY TURNED OUT):


So how do you make a couple of these beauties? It's actually pretty simple, First, gather your materials:


This is what I needed to make two pillows:
  • Two pillowforms (18")
  • Graph paper
  • Iron
  • Wonder-Under or other iron-on adhesive
  • 1 yard Scrabble tile-colored fabric
  • Scraps of black fabric (I had ~1/4 yd of black fabric that my mother threw in with my craft stuff when my parents helped move me in - thanks Mom!)
  • Sewing machine/thread/ruler/pencil/any other normal craft supplies you need to feel productive (this includes my Disney Pandora station for me)


The letters are appliqued-on via wonder-under. If you've never used (or heard of) the wonder that goes under, it's an iron-on adhesive that makes projects like this a breeze. First, I figured out how large my letters should be, via graph paper. And by via graph paper, I mean I just laid it on, eyeballed how big I wanted them to be (referencing a quick google image search for "scrabble tile") and marked it with pencil.

I am clearly the most precise crafter you'll ever meet.


Then I sketched out my letters.

And vowed never ever to use anything but graph paper to draw. Ever. Again. It's magical. My letters were proportional!

 (...as somebody whose artistic ability goes about as far as stick figures, this was very exciting.)


Stick Wonder-Under to the back of your fabric by following the ironing instructions and cut the letter out of the fabric/Wonder Under combination.

Then, like an idiot because you did it backwards. So remember that you should pin your letter on the side of the fabric that DOES NOT have the Wonder Under paper.


See? It should be like this.

So cut them out the proper direction and place them on.

Iron them to secure.

Next, realize that they fray and will not stay. The particular type of Wonder Under that I was using is only meant to anchor fabric while you applique it on. Make sure you read the instructions thoroughly so that you get a sturdy enough connection. You wouldn't want your letters falling off! So I stitched to secure the letters.

I used a small zigzag, with the zig on the letter and the zag on the background. This eliminated these pesky little frays:


At this point, you will have two banners with letters in the middle. I used this tutorial for instructions on how to sew my envelope pillow cases. The idea is that you have two long, raw edges and two short, finished edges. You fold the top down and the bottom up so that they have 3-4" of overlap in the middle.


This is what it looks like folded. Note that the one on the bottom of the stack was the one I wanted on the outside (I cheated and used the selvage for the inside edge).

Stitch those suckers up, flip it right side out, cram a pillow form in there and...
Ta-da! Two wonderful Scrabble tile pillows, ready for a couch or bed.


I found it amusing to tell my best friend that she was worth more than her husband (she's the K, he's the B). What do you think? Would you make them your initials or is there something else that you're dying to spell with pillows?

Thursday, June 27, 2013

Bruin Games

My high school mascot was the Bruin. A mighty creature, often mistakenly understood to be a pregnant bear, it is just a Dutch way of saying "brown bear." (Wikipedia says so)

While I was in high school, a few of the sports teams fell into the habit of losing. But not just losing outright; we would be in the lead for the first 2/3 of the game, then lose our lead and the game by the time the game was over.

It was really rough on morale.

Well, I've fallen into a sort of Bruin game habit in my life. I'll come up with an idea for a project and get super-excited about it, do a little research, maybe even buy supplies. But then I'll suddenly lose steam and I end up with a stack of Ikea clocks on my desk and balls and balls of yarn just laying around.

Bruin games of life are why I wanted to start blogging. I wanted a reason to finish projects, because the satisfaction of finishing a project was clearly not enough to make it happen. Maybe, optimistic Kath would think, maybe if I have a deadline, a schedule, maybe then I could actually accomplish things.

Now I have a blog with two posts since its creation in September and the same number of pending projects. Oops.

So I'm going to up the ante. I'm going to give myself even more structure. This is going to be a TWO POST PER WEEK BLOG!

But Kath, incredulous audiences protest, how could you possibly make two posts per week when you couldn't even handle one?!

Well, I'll tell you.

I'm going to have Monday posts and Saturday posts. Monday's posts are going to be me creating goals for the month (finish a project per week, get back on the Couch-to-5k bandwagon, etc) and Saturday's posts are going to be finished projects/tutorials/tips'n'tricks/etc.

Can y'all get behind that? I'm so excited about it that I already have Saturday's post written and scheduled to publish! I'm ahead of schedule! Can  you believe it?!

Anyway, once I get into the rhythm of this, I'll actually start working on spreading this blog to readers. But I want there to be some content before I do that. So here goes.

See you Saturday!