I'm super-excited to bring you my first tutorial: Scrabble Tile Pillows!
My best friend is madly in love with Scrabble and other word games. I personally don't understand it because I am terrible at anagram-style puzzles. It probably has to do with my left/right brain balance, but whatever the reason, I haven't the patience for the game. But my best friend - boy oh boy, does she ever like it. In fact, she loves that game so much that her now-husband proposed to her via Scrabble board. It was adorable.
For her birthday (and by "for her birthday", I mean "several months after the fact, when I finally got around to making them"), I decided I would make her some pillows in the style of Scrabble tiles. Here's the finished product (and can I just say that I AM SO PROUD OF HOW THEY TURNED OUT):
So how do you make a couple of these beauties? It's actually pretty simple, First, gather your materials:
This is what I needed to make two pillows:
- Two pillowforms (18")
- Graph paper
- Iron
- Wonder-Under or other iron-on adhesive
- 1 yard Scrabble tile-colored fabric
- Scraps of black fabric (I had ~1/4 yd of black fabric that my mother threw in with my craft stuff when my parents helped move me in - thanks Mom!)
- Sewing machine/thread/ruler/pencil/any other normal craft supplies you need to feel productive (this includes my Disney Pandora station for me)
The letters are appliqued-on via wonder-under. If you've never used (or
heard of) the wonder that goes under, it's an iron-on adhesive that
makes projects like this a breeze. First, I figured out how large my
letters should be, via graph paper. And by via graph paper, I mean I just laid it on, eyeballed how big I wanted them to be (referencing a quick google image search for "scrabble tile") and marked it with pencil.
I am clearly the most precise crafter you'll ever meet.
I am clearly the most precise crafter you'll ever meet.
Then I sketched out my letters.
And vowed never ever to use anything but graph paper to draw. Ever. Again. It's magical. My letters were proportional!
(...as somebody whose artistic ability goes about as far as stick figures, this was very exciting.)
Stick Wonder-Under to the back of your fabric by following the ironing instructions and cut the letter out of the fabric/Wonder Under combination.
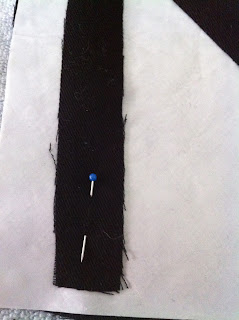
Then, like an idiot because you did it backwards. So remember that you should pin your letter on the side of the fabric that DOES NOT have the Wonder Under paper.
See? It should be like this.
So cut them out the proper direction and place them on.
Iron them to secure.
Next, realize that they fray and will not stay. The particular type of Wonder Under that I was using is only meant to anchor fabric while you applique it on. Make sure you read the instructions thoroughly so that you get a sturdy enough connection. You wouldn't want your letters falling off! So I stitched to secure the letters.
I used a small zigzag, with the zig on the letter and the zag on the background. This eliminated these pesky little frays:
I used a small zigzag, with the zig on the letter and the zag on the background. This eliminated these pesky little frays:

At this point, you will have two banners with letters in the middle. I used this tutorial for instructions on how to sew my envelope pillow cases. The idea is that you have two long, raw edges and two short, finished edges. You fold the top down and the bottom up so that they have 3-4" of overlap in the middle.

This is what it looks like folded. Note that the one on the bottom of the stack was the one I wanted on the outside (I cheated and used the selvage for the inside edge).
Stitch those suckers up, flip it right side out, cram a pillow form in there and...
Ta-da! Two wonderful Scrabble tile pillows, ready for a couch or bed.


They look great Kath! I bet they love them.
ReplyDelete